The first photo a buyer sees decides whether they keep scrolling or stop and read the listing. A little preparation before shoot day is the difference between a home that looks lived in and one that looks ready to sell. This is the checklist we share with vendors and agents across the Central Coast, from Terrigal and Wamberal through to Gosford and Avoca Beach.
Why preparation matters more than you think
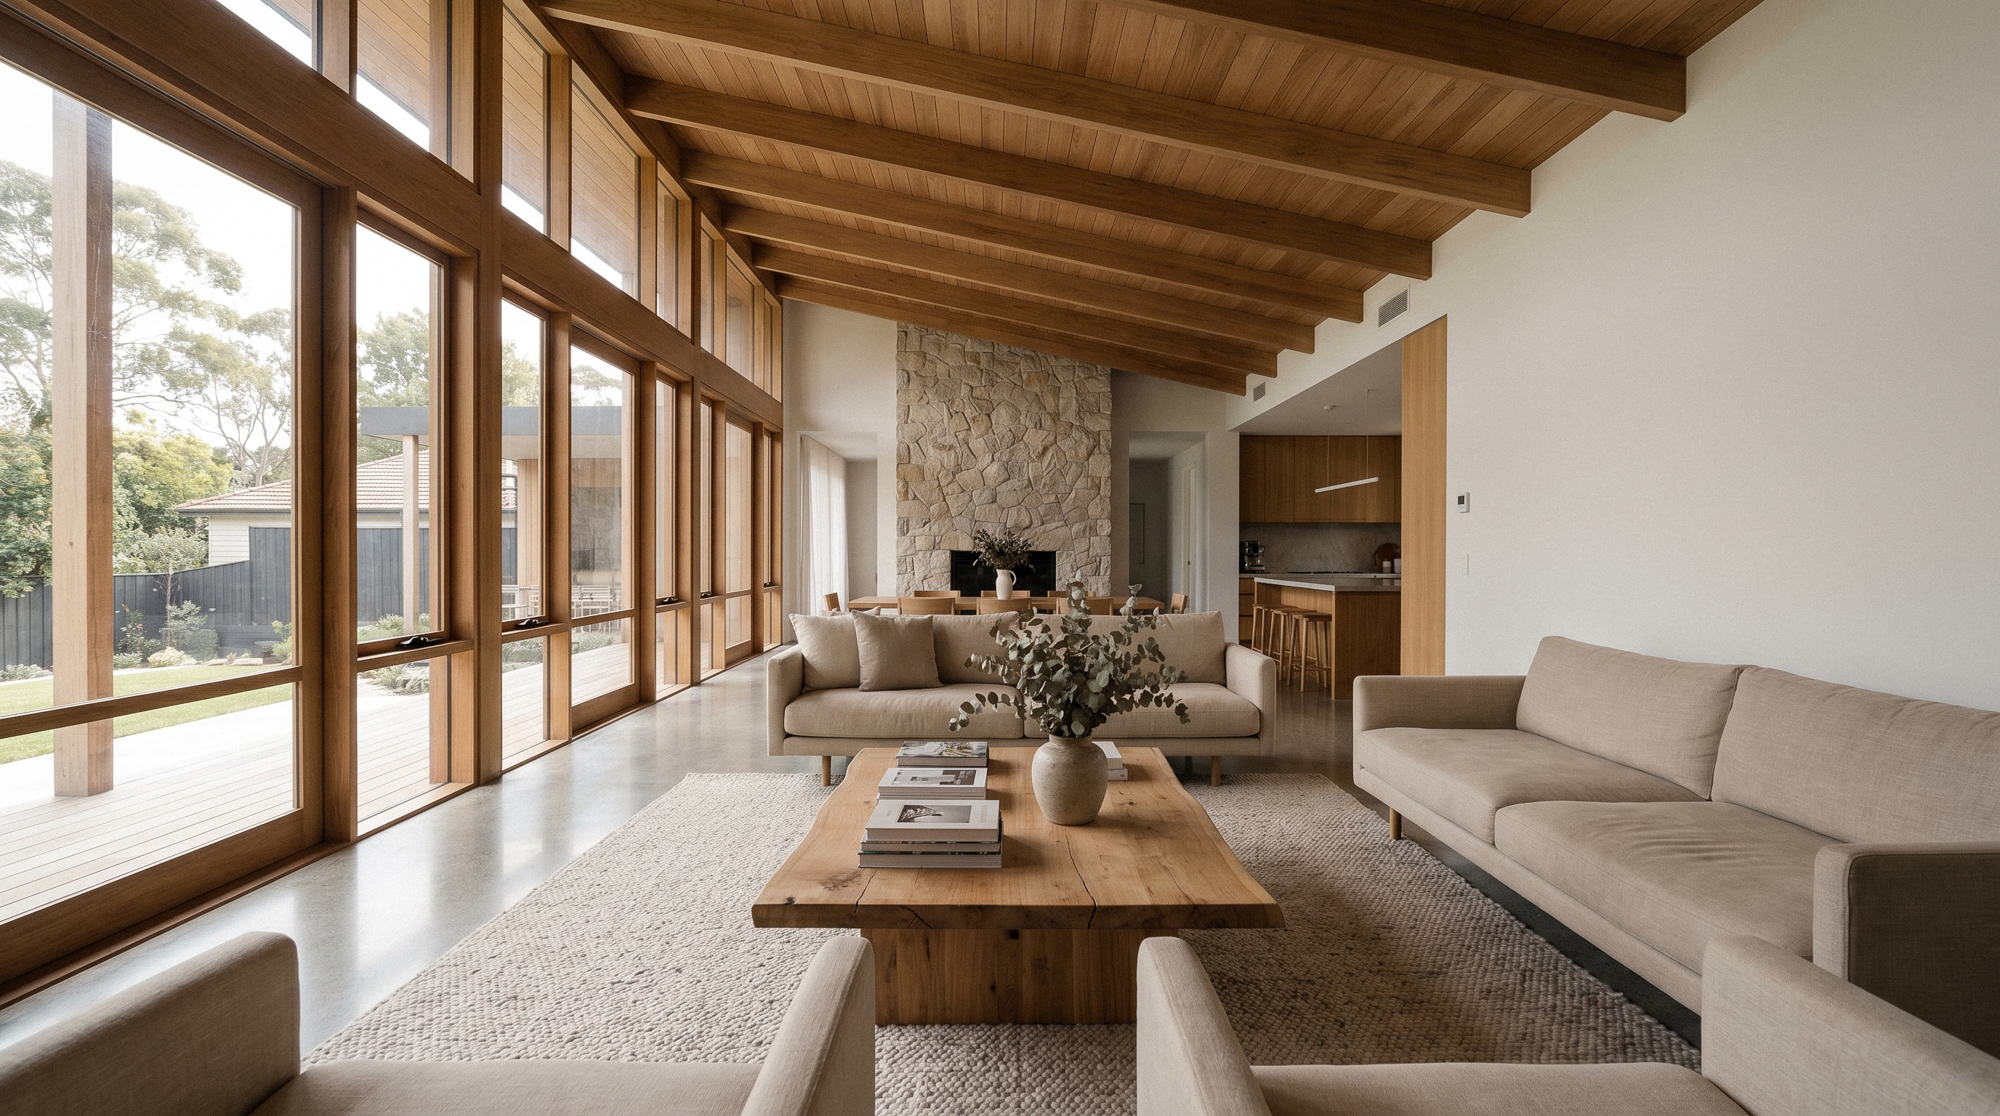
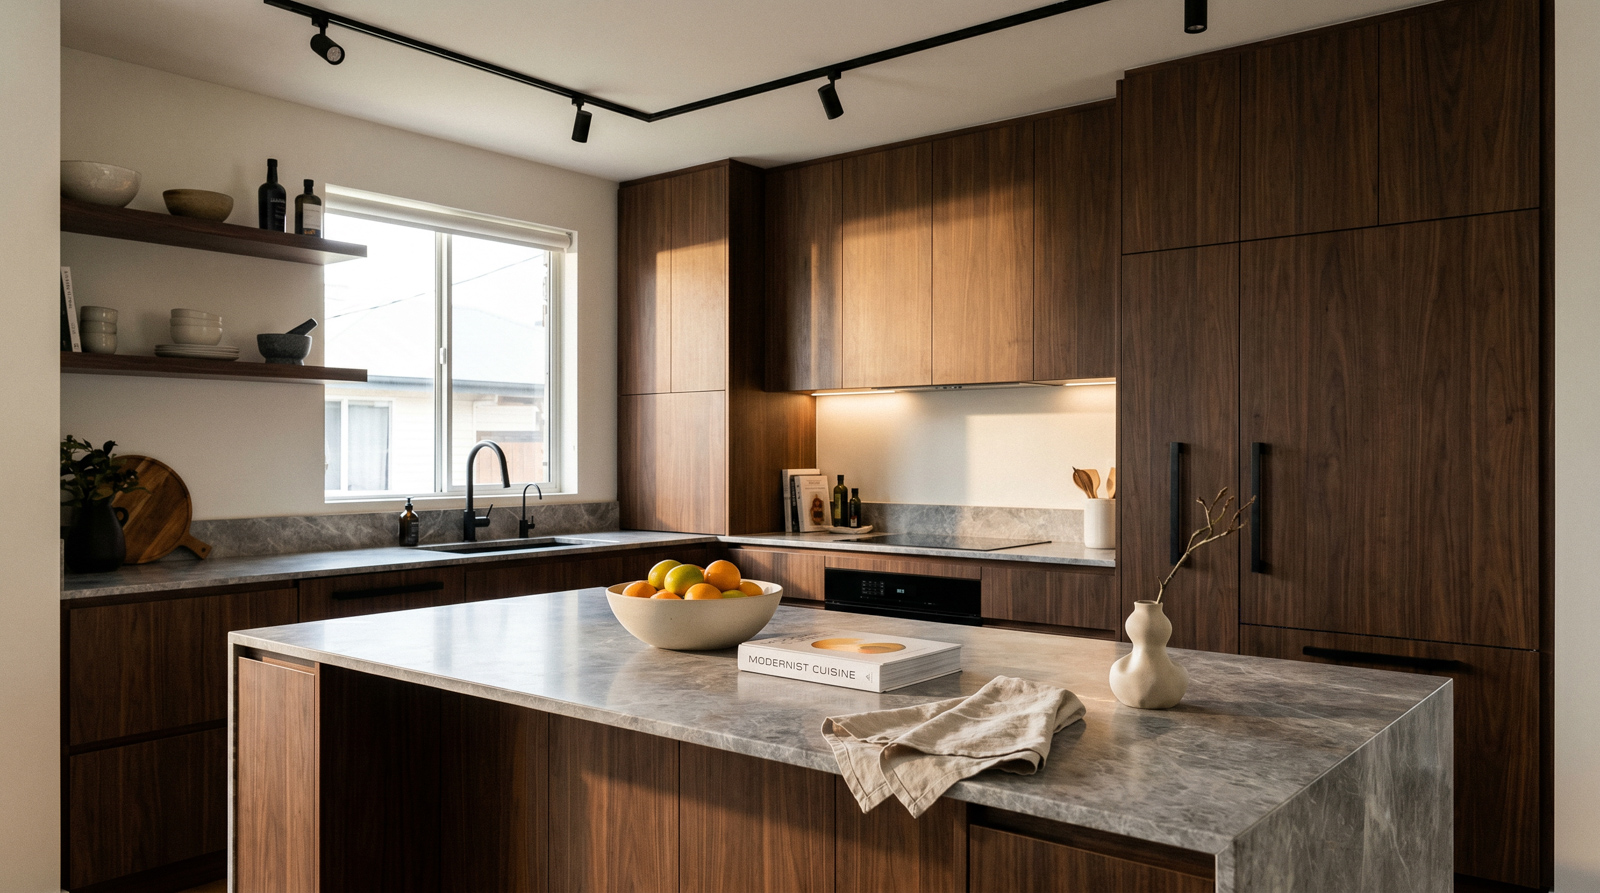
A camera flattens a room. Clutter that your eye filters out in person becomes the first thing a buyer notices in a photo. Preparing the home is not about hiding anything, it is about removing the small distractions so the architecture, the light and the space can speak for themselves. Twenty minutes of tidying per room usually does more for a listing than any amount of editing afterwards.
Start with a declutter, room by room
Work through the home one room at a time rather than trying to tidy everything at once. Clear flat surfaces first, since benchtops, coffee tables and bedside tables are where clutter shows most in a photo.
- Kitchen: clear the benches. Remove the toaster, kettle, dish rack, magnets, notes and tea towels. A bowl of fresh fruit is the one thing worth leaving out.
- Living areas: tuck away remotes, chargers, kids' toys and stacked magazines. Straighten cushions and fold throws.
- Bedrooms: make the beds with clean, neutral linen and clear the bedside tables down to a lamp.
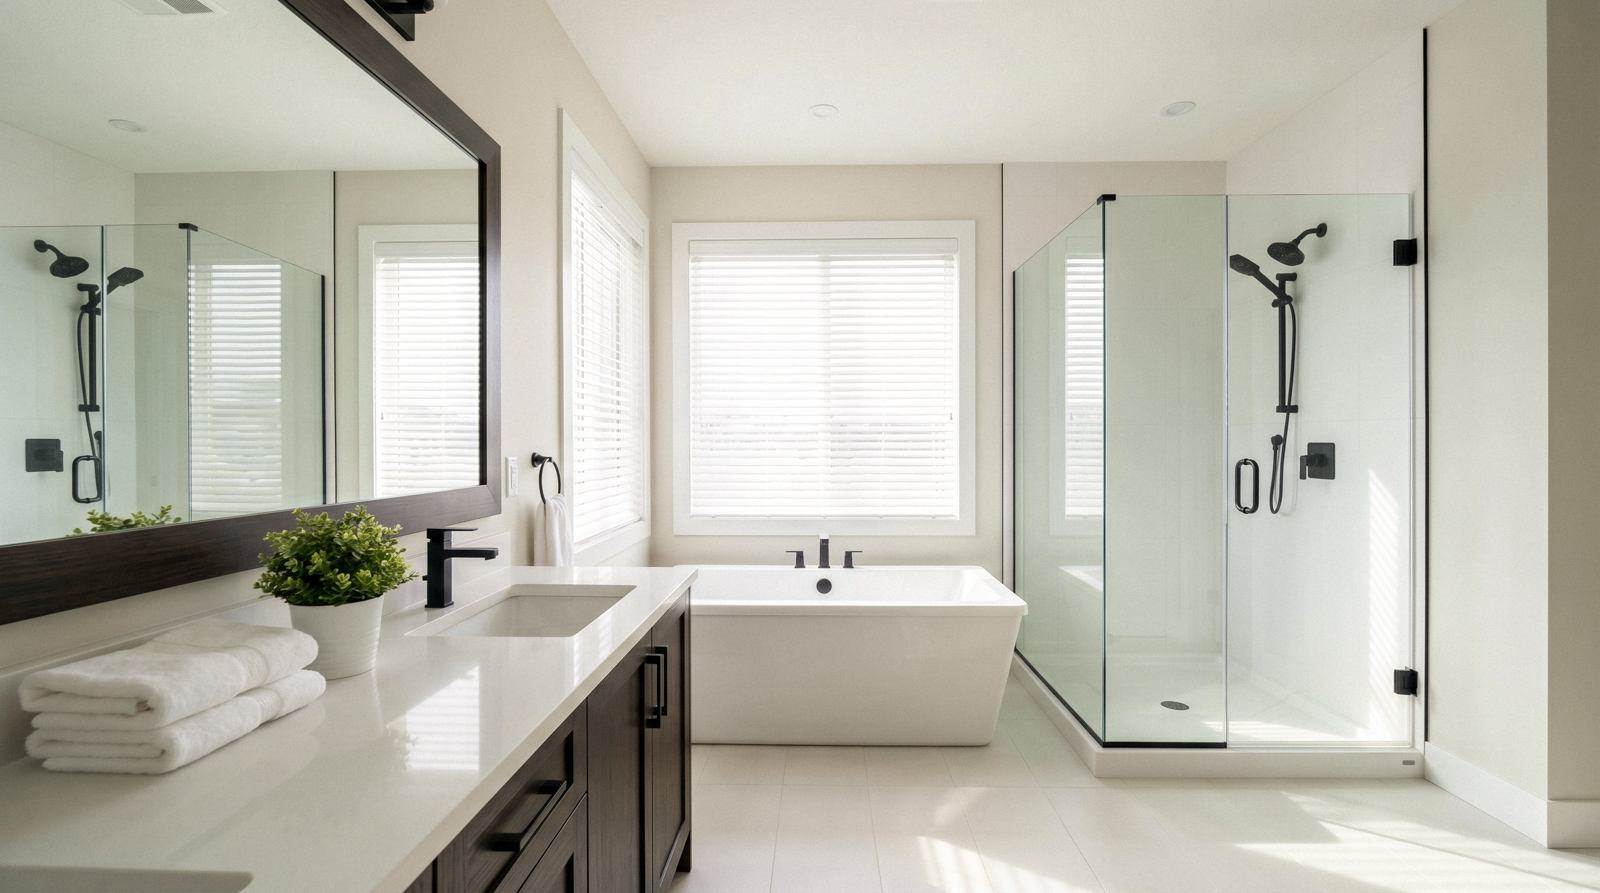
- Bathrooms: remove toiletries, brushes and bins. Hang fresh, matching towels and close the toilet lid.
- Floors: anything on the floor that is not furniture should be moved, including baskets, shoes, pet bowls and floor mats that have seen better days.
Clean the surfaces the camera notices
You do not need a full spring clean, but a few surfaces reward the effort because they catch light and reflections. Mirrors and glass splashbacks show smears clearly. Stainless steel appliances show fingerprints. Windows matter because we will be shooting toward the light to show off your Central Coast views, and clean glass keeps that view sharp.
- Wipe down mirrors, glass and stainless steel.
- Clean the insides of windows facing a view or the street.
- Vacuum and mop so floors photograph evenly.
- Empty bins and tuck them out of sight.
Make the most of natural light
Central Coast homes are at their best in natural light, so we plan around it. Open every curtain and blind before we arrive and pull sheers right back. Turn ceiling fans off so blades sit still in the frame. We will usually balance the indoor lighting for you on the day, but having lamps and globes working and matching in colour helps a great deal. For west-facing homes and coastal blocks where afternoon glare is strong, timing the shoot for the gentler part of the day makes a real difference, and we factor this in when we schedule.
Styling touches that lift a listing
Small, restrained styling reads as care without looking staged. The goal is warmth and a sense that the home is loved, not a magazine shoot.
- A vase of fresh flowers or greenery on the dining or kitchen bench.
- Three matching towels rolled or hung neatly in bathrooms.
- A bowl of fruit for colour in the kitchen.
- Cushions plumped and arranged in odd numbers.
- Dining table set lightly, or left clean and clear, never half cleared.
Outdoor areas and street appeal
Buyers form an opinion from the very first exterior photo, so the outside deserves the same attention as the inside. Mow and edge the lawn, pull obvious weeds, and sweep paths and the driveway. Pack away the hose, bins, kids' play equipment and anything stored down the side of the house. On decks and patios, set the outdoor furniture as you would for guests and clear the barbecue. If we are capturing the block or the surrounds with drone photography, a tidy roofline, gutters and backyard all show up from above.
Cars, pets and people
Move all cars off the driveway and away from the front of the house, including the neighbours' where you can. Driveways and the street frontage photograph best clear. Pets and their bowls, beds and toys should be out of sight, and it helps to have somewhere for them to be during the shoot. The home should be empty of people in the photos, so plan to step out or stay in a room we have already finished.
The morning of the shoot: a quick checklist
- Open all curtains, blinds and sheers.
- Turn on lamps, turn off ceiling fans and the television.
- Clear benchtops and bedside tables one last time.
- Make the beds and straighten cushions.
- Hide bins, baskets, chargers and pet items.
- Move cars off the driveway.
- Do a final lap with fresh eyes, room by room.
What we handle on the day
Once the home is prepped, the rest is on us. We bring lighting, balance each room and capture the angles that make spaces feel open and true to life. From the same visit we can add floor plans, aerial drone photography and video, so the whole listing is ready to go together. You can see how finished listings come together in our recent work.
Final word
You do not need to be a stylist to get great photos. Declutter, clean the surfaces that catch light, open the home up and let the space breathe. Do that and the photography will carry the listing. If you are unsure about anything specific to your property, just get in touch before the shoot and we will talk it through.
Frequently asked questions
- How long does a real estate photoshoot take?
- Most Central Coast homes take between 45 minutes and 90 minutes depending on size and the number of add-ons like floor plans or drone. Larger or acreage properties take longer. We will give you a clear estimate when you book.
- Do I need to be home during the shoot?
- Someone needs to provide access, but the home should be empty of people for the photos. Many vendors let us in and then step out, or wait in a room we have already photographed. Agents often handle access directly.
- What if the weather is bad on shoot day?
- Interiors are unaffected by weather. For exteriors and drone work that depend on conditions, we will talk through timing and, if needed, reschedule the outdoor portion so your listing still looks its best.
- How quickly will I get the photos?
- Standard turnaround is 24 to 48 hours, delivered to a private online gallery ready for web and print. Rush delivery is available when a listing cannot wait.